
I designed the comparative standards primarily as a way to test one gun against another. More practically, I use the standards to compare a range of handguns and calibers to each other.
The idea was simple, as I stated in Shooting Wire a couple of years ago:
“… (adding to my problem is) the proliferation of new gun owners who actually carry their guns – and shoot them. That can create issues of time, location and costs. As more manufacturers move to package ammo in ‘non-standard’ boxes (20 or 25 rounds), I considered the idea of a short comparative standards course.
“Basically, it’s a matter of striving to accomplish each string in three seconds or less (even if you can’t), selecting a target and staying with it (to make a relevant comparison), to find where the shooter is having issues and enable practice that can be later checked by running the same course again.
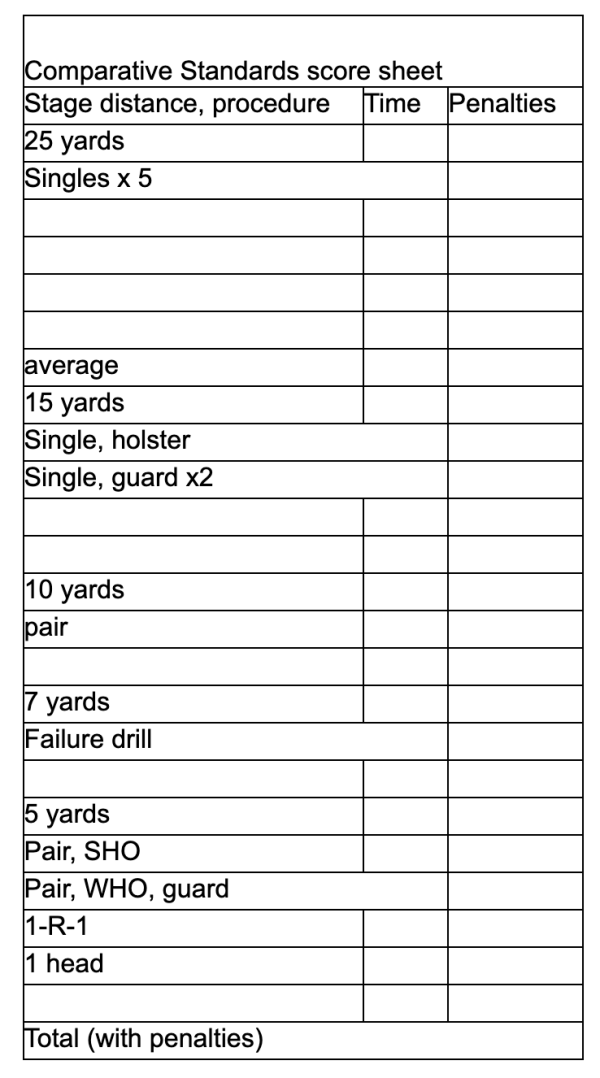
“The concept is simple: Each string is timed – and penalties noted, with each time recorded to be compared against every other like string in the database. Total time for the 20 round course is recorded with time added for penalties, .5 second (now changed to ONE second) for every point down. There are draws to single hits, single hits from low ready, shooting one handed with each hand, a reload stage, a failure drill and a single to the head. Eight rounds are consumed at fifteen yards and further; another pair is consumed at ten yards making half of the score shot at thirty-plus feet.”
It’s a great way to check gun-versus-gun, caliber versus caliber -- but it's also a handy way to practice. Each stage can be practiced individually to square away your skill sets. I’d been considering a better way to practice before I came back to this old idea of comparison – and now equate it with establishment of a baseline of performance.
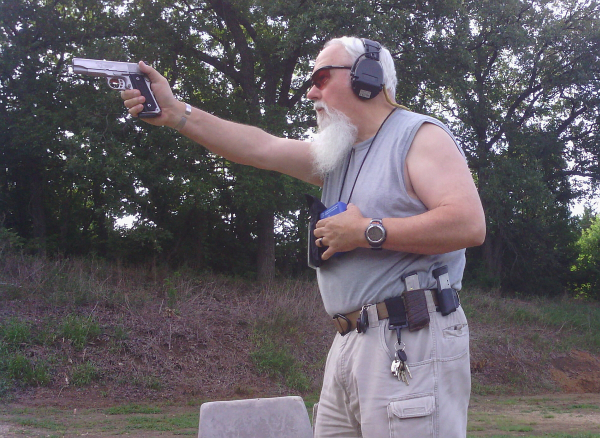
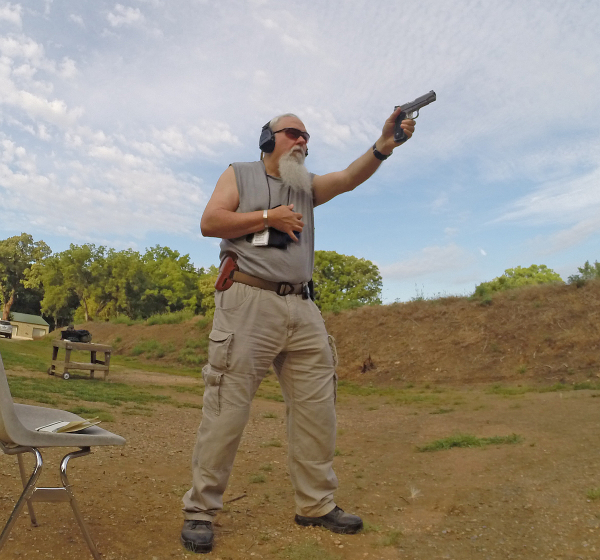
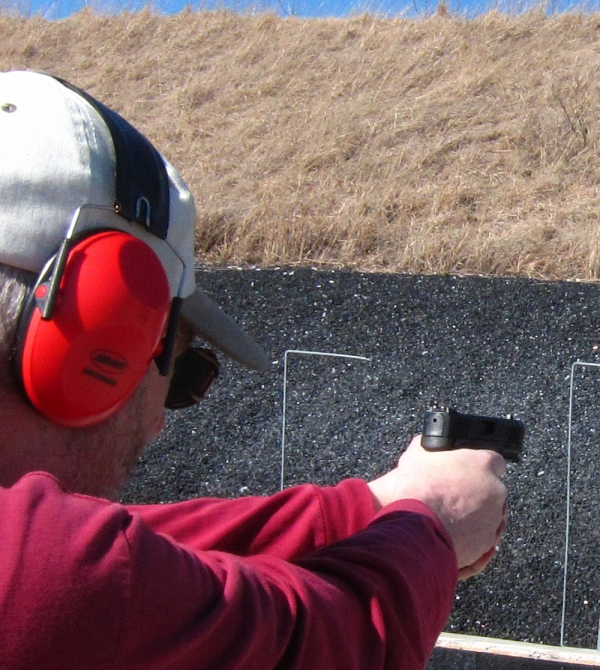
The first thing you should do is not to have a par time set on your timer. All you're doing is collecting the time that it takes to perform individual tasks. Make notes of the time for each repetition of each task. The tasks include single hits from the holster, pairs from the holster, singles from ready, failure drill, reload drill, shooting from one hand - either hand.
Using the standards, you isolate skills that you need to master. I recommend, if you're a new shooter, ignore the 25 yard and 15-yard parts of the standards. Start up close with smaller targets. At first set your baseline. The way you set your baseline is to set your timer for random start then perform the drill. Note the time (and penalties) for each and every string – lots of record keeping, little shooting. It’s a chore, but after you accumulate data from several repetitions, you have some idea of what you're able to do.
If you’re new to carry of the handgun, begin with picking the gun up off a table – safely, without touching the trigger or waving the muzzle around. You can also start from guard – a low ready – or threat compressed ready, a part of the draw stroke. Make sure you note where you start from on each exercise.
Don't rush it. Make sure you get the hits. A loud noise seldom accomplishes anything that you need accomplished. Settle on one skill at a time. Try not to mix it up a lot -- unless you're getting bored. Start slow for form and perfection, then accelerate just a little. Before you leave the range, do just one more set that’s slow for form – that’s what you want hardwired into the system.
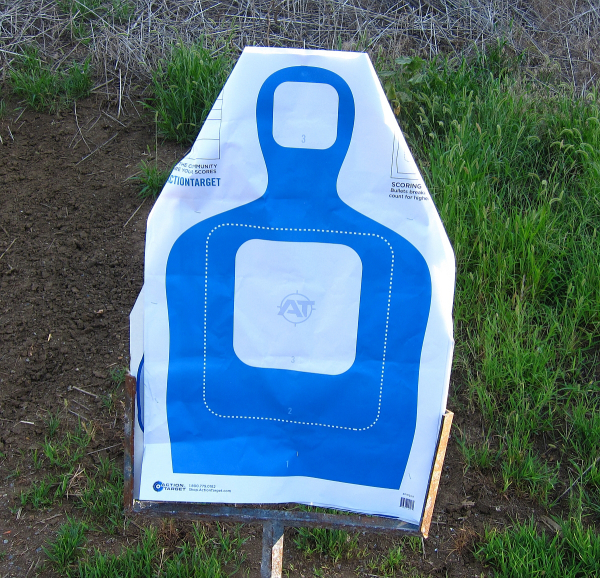
I recommend an 8-inch circle as a target – or just use a sheet of copy paper. When you're trying for a 'high value' shot (for the failure drill), I recommend a 3” by 5” card.
The Comparative Standards, and the reference for each string, follow:
25 yards, singles from holster – each timed. The average of the strings in the stage is calculated and any penalties recorded before the next step.
15 yards, single from holster; two singles from guard/low ready – times for each recorded. Taken from the previous Arizona Daytime Qualification. “Low ready” is defined thus: the gun aimed in where the target stand meets the ground, finger at register. Record any penalties.
- If you’re new to shooting, the longer stages really don’t apply yet. Work on the closer drills for precision – not for time. The following stages are recommended.
10 yards, pair from the holster – record the time. This is taken from the Wizard Drill, where the standard is 2.5 seconds. Record any penalties.
7 yards, failure drill. Record any penalties as well as the time.
5 yards – From holster, dominant hand only; from low ready, non-dominant hand only; from holster, draw to a single – slide lock reload – fire another single hit; from holster, one shot to head box. Record the time for each string and record any penalties.
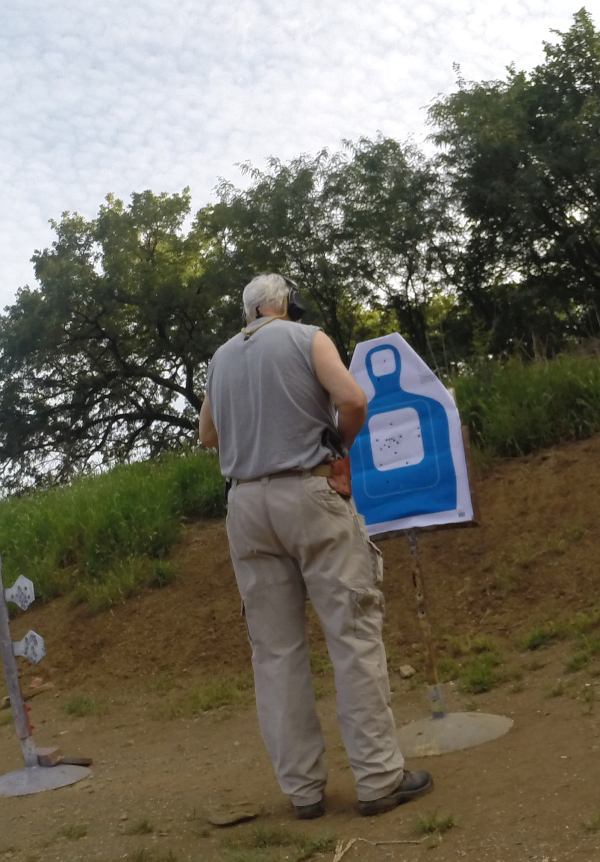
You’ll notice in the images, I use the Action Target “TQ-15” analog. I have plenty of them and I use them consistently. When they run out, I’ll go to something else, note the change in my records and set a baseline.
For practice using a rimfire analog (like the GLOCK 44, S&W M&P22 Compact, Ruger LCP II Lite-Rack), restrict your practice to singles from the holster (if you’re experienced) or from ready, as well as working reloads – fire one hit, slidelock reload, fire one hit.
The Comparative Standards can help you find your baseline, can help you practice and can be used to compare different handguns, different calibers – even different holsters.
-- Rich Grassi