
Editor’s Note: Before starting off on a project like this, consider the skills required in terms of metal working – assuming you can properly detail strip and reassemble your gun. If you’re like the editor, you leave stuff like this to the pros – though it is interesting to see what someone knowledgeable can do with some time and effort . . .
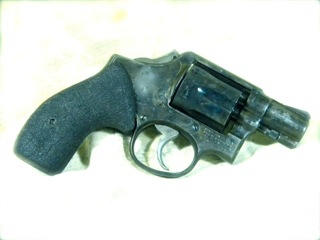
The "before shot" of the gun. Rough shape, not really sure what happened to the side plate - it was this way when I bought it.
|
I have a Smith & Wesson Model 10 revolver with two-inch barrel that I love and carry regularly. It started out as a square butt, which I cut down to round. I also bobbed the hammer, thinned down the trigger guard and the other usual mod’s you do with a revolver. The only problem was it had a rough finish, especially the side plate – I’m not sure what happened to it and it was this way when I bought it. So, since it was raining today and outside work was out I decided to try Birchwood Casey’s new Perma Color Case Coloring Kit, which provides a case colored finish without the hassle and expense of a true case hardened finish.
After disassembling the revolver I sanded off the blue finish, using sandpaper and scotchbrite wheels on my rotary tool. The instructions recommend using 300-600 grit, but since the finish was already rough I didn’t worry about getting it “baby bottom smooth.”
After sanding, the parts were degreased using Birchwood Casey’s cleaner degreaser. The cleaner doesn’t come in the kit, so this is something you’ll have to pick up extra. The key with any finishing project is prep; with cold bluing this is mandatory. Wear gloves – change them often, and clean several times and make sure to get all grease and oil off the metal.

I removed the remaining blue with sandpaper and wheel on the rotary tool.
|
Now, it’s time to apply the case coloring blues. The kit comes with three different “blues” – a bottle of Dark Iridescent, Indigo Iridescent and a Multi Color Iridescent plus cotton swabs for application. The instructions recommend what order to apply the colors in, and I followed the directions as to the sequence of colors.
I put the side plate back on the frame, along with the yoke so that everything would flow together when finished. The cylinder I did separately. I put more clean gloves on before starting the finishing.
It’s a good idea to test the process using a scrap piece of metal to get your technique down. I admit that I didn’t do this. Sometimes I just like to go for it; if it doesn’t work out well I know it can be sanded and done over again. (Remember, this revolver had a rough looking finish to start with, so anything was probably going to be an improvement.) You apply one color, and then neutralize it using water. After completely drying – remember cleanliness – you apply the next color, and repeat the process for the third color. To ensure the water was removed I used a heat gun to dry the metal in-between applications, plus I think having the metal a little heated helps with the application of the colors.
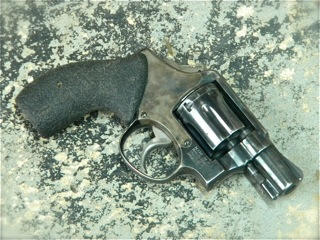
The finished project looks good, a lot better than the picture shows. And it was quick and easy to do.
|
After getting everything coated with the three colors I coated it down with oil. The instructions recommended applying a thin coat of a clear type spray finish, but I wasn’t sure how this would hold up to the abuse the pistol was going to see. Plus, remember this is taking place on a rainy day, which is never a good time to apply any type spray finish.
The final results look good. (The pictures don’t really show off the colors.) And for the first time I’ve used the kit I’m pleased. If you’re looking for a case colored finish, but don’t want to go through the hassle or expense I highly recommend Birchwood Casey’s kit – and any of the other products they sell. I’ve been using them for years, and have never been disappointed.
Tiger McKee is director of Shootrite Firearms Academy, located in northern Alabama. He is the author of The Book of Two Guns, AR-15 Skills and Drills, featured on GunTalk’s DVD, “Fighting With The 1911 and has regular columns in Gun Digest and American Handgunner.
http://www.facebook.com/pages/Shootrite-Firearms-Academy/156608611038230?ref=ts