
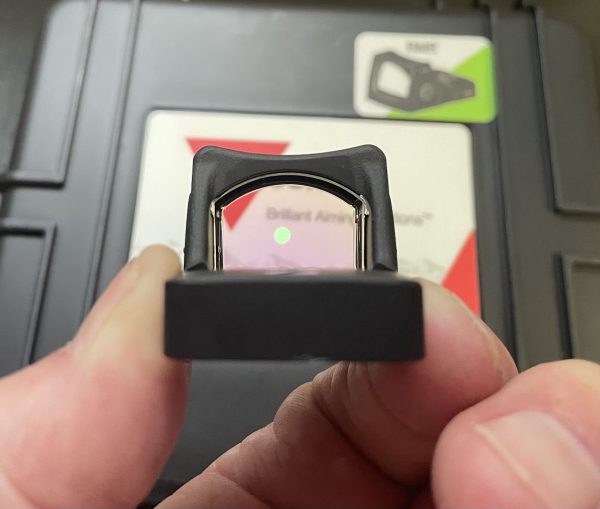
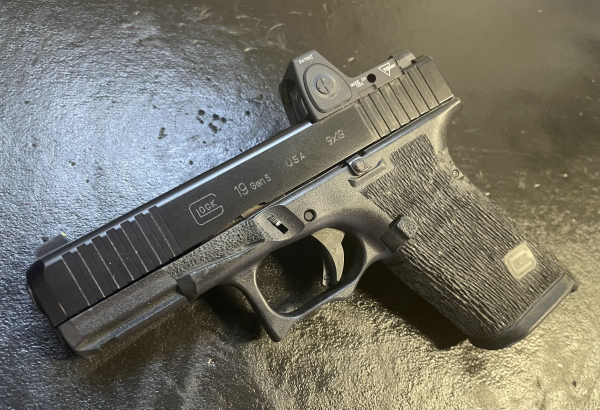
We’re not talking environmentally friendly; we’re talking dot color. There has been much anticipation of Trijicon introducing a green dot version of the hugely successful Ruggedized Miniature Reflex. While I see red dots fine in daylight, eye specialists tell me the human eye’s sensitivity to green wavelengths is noteworthy.
The eyes will find a green dot more quickly while maintaining visibility in bright light, resist washout and perform better in fog, haze and other complex backgrounds. Green is also easier on the eyes, reducing strain during prolonged use and providing a clearer aim point for those with astigmatism. The 1.2-ounce RMR has a well-deserved reputation for durability, being constructed from forged 7075-T6 aluminum to MIL standards. It’s hard to dispute that level of durability is nice to have, even for the typical EDC or LE end user.
Some will be disappointed the updated green RMR does not come with a top loading battery compartment. I am not. In truth, I have not found removing the optic to change the battery to be a big chore and I have never had to re-zero my RMR’s after doing so. The bottom loading feature helps keep the RMR flat and compact, which I think is worthwhile. The green dot version of the RMR offers a two-year battery life with the dot on a mid-setting.
A button lock-out mode prevents accidental adjustments to preferred brightness while the battery conservation mode adjusts the aiming dot to ambient light conditions after 16.5 hours without a push of the button. This further extends battery life. The RMR is powered by a single CR2032 battery which should have either Duracell or Energizer printed on the battery case. The new green dot is 3.25 MOA in size.
The RMR’s unique, patented design offers unsurpassed durability, withstanding multiple drops directly on the housing over hard surfaces like concrete. It also offers a very intuitive push button illumination system while being waterproof to 20 meters. The RMR is made totally in the U.S.A by American workers making American wages which is why all Trijicon products cost more.
Mounting the optic is something that requires attention. Every time I have seen an optic come loose it was directly related to improper mounting. While there is considerable information available in regards to mounting an optic, through trial and error, I have come up with a system that works quite well.
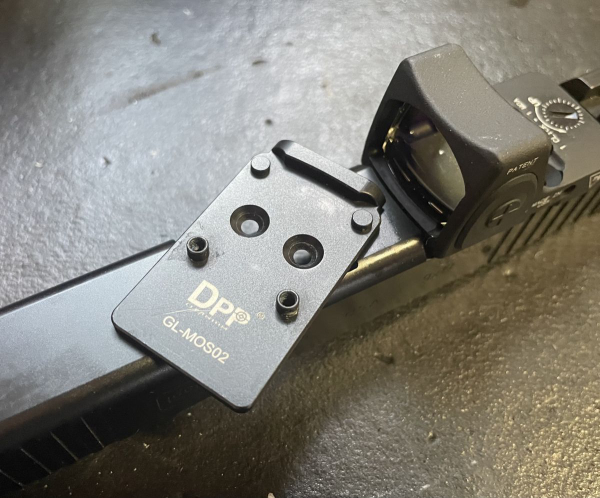
Direct mounting, attaching the optic directly to the slide without a mounting plate, is the best way to go. It eliminates something that can go potentially wrong. I have come to realize that mounting plates are not the “evil” I once thought they were, but it is essential to avoid all of the junk available on line. It is really easy to try and save money by buying an off-brand plate but don’t do it! I once bought a plate online that sounded like it was made with quality materials, but when I attempted to tighten the mounting screws, the threaded post just twisted off. A quality plate will fit snugly in the slide cut and will have threaded posts, not just threaded holes. The more threads, the more solid the mount.
When tightening screws, it is best to have a torque screw driver to ensure proper tightening. Most manufactures will have suggested tightness settings. Fix-It-Sticks is one example of a popular choice. If you do not have one, I have found if I hand tighten and then give it an extra “nudge,” the screws stay locked in place without over-tightening.
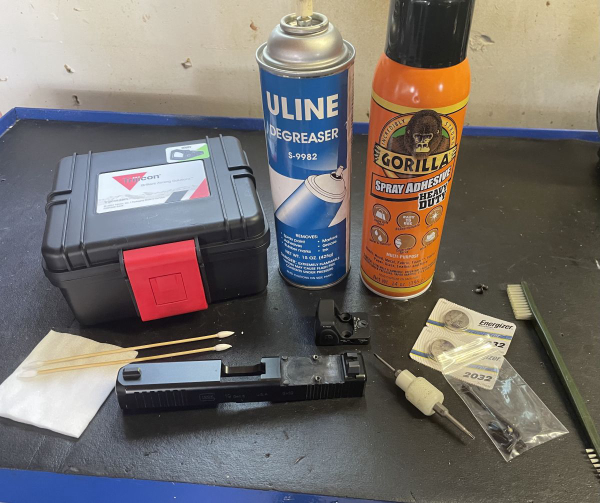
De-grease everything. The screw holes, the screws, the bottom of the mounting plate, the slide cut --everything that will aid in achieving a solid mount. Even with a tight plate to slide fit, I will add an adhesive to the bottom of the plate. This will result in additional adhesion, but the plate can be popped off if necessary. I have used Gorilla spray adhesive with great success but there are others. Even if the screws have Loc-Tite on the threads, I add additional blue Loc-Tite. It should be a thin coating, not a “helmet” that covers the screw entirely. Let the mounted optic and slide sit for a day before shooting so it can set up properly.
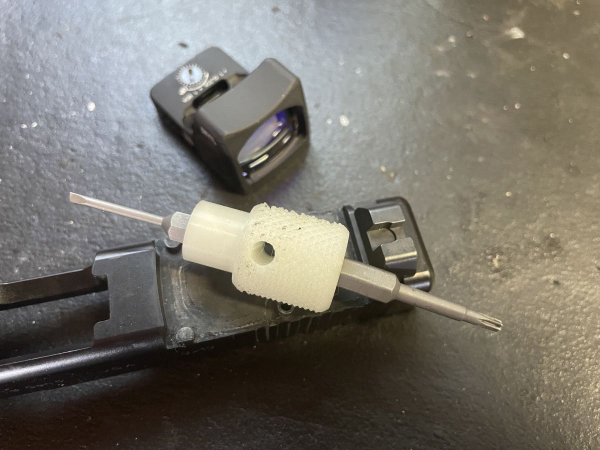
The Pistol Mounted Optic Tool from Patriot Products AZ is a simple, compact and effective tool to have on hand for mounting and maintain your carry optic. It’s at home on the work bench or in your shooting bag. It’s available from the Gunsite Pro Shop as well as several other outlets and is a well-constructed piece of kit.
After a few range sessions with the green RMR, I can honestly say the green dot is easier to find. Of course, the optic must make it into the eye/target line in order for this to occur. While some say this process requires specialized training, I have not found this to be the case. If I had to point to one thing that helps folks find the dot more quickly and reliably, it would be this: QUIT steering the optic and POINT the muzzle! Sounds obvious but it’s not. “Muzzle awareness” is more than a safety protocol.
A consistent path of travel is what is required to find the dot every time. This should occur from the holster, ready or after a manipulation. It is found in many athletic activities. Ask a golfer if his club must follow a consistent path of travel if he/she wants to hit the ball down the center of the fairway. A foul shot or a pitch? Yep, consistent path of travel. Seems obvious, so why do we accept so much slop when it comes to presenting a handgun to the target? Many shooters will snatch the gun from the holster, fling it towards the target, correct alignment at the end, smash the trigger and immediately look at the timer.
I do know if we PLACE the muzzle where it will do us some good, the optic will go there as well and be much easier to see. REMEMBER: the most important thing you can do in a gunfight is get the muzzle between you and the threat.
— Dave Spaulding