
Last week, author Dave Spaulding began his discussion of “what to practice” with (1) identifying and the practice of essential skills and (2) using dry practice to reinforce all the skills possible without firing a round. This time, the exercise moves on to the range with drills designed to reinforce those essentials.
On the Range
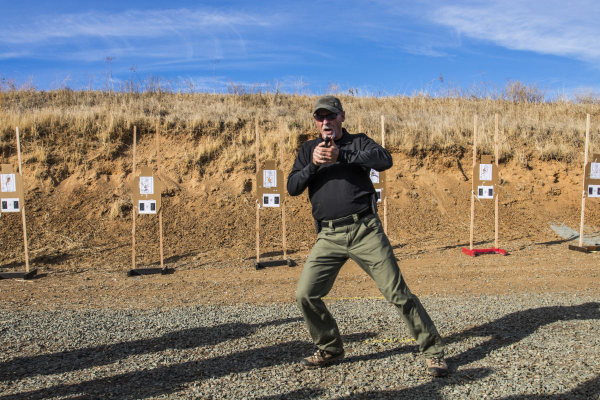
With the previous thoughts in mind as I head to the range, I start out with a few timed drills to see where I’m at. I do these drills “cold,” as I believe they are a better indicator of performance than after I have shot for a while. Remember, it’s unlikely you’ll have just come from a practice session at the range when your gunfight occurs. You’ll more than likely be “cold” as well.
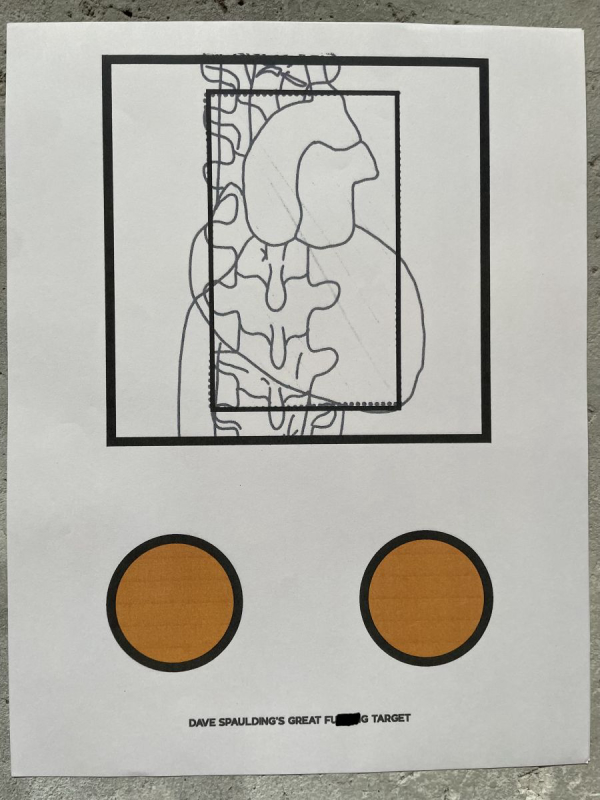
I use a simple target of my own design that has been labeled (tongue and cheek) “Dave Spaulding’s Great (expletive-deleted) Target 1.” It is available on the Handgun Combatives Store website. It is a simple six-inch square with the high chest body organs contained inside. A 3 x 5 rectangle is visible on top of the heart while two two-inch orange-colored dots are on the bottom. There is a target 2, but it is used mostly for carry optics training.
My first drill is a reduced round count version of my old Three Round Fade Back Drill. I shoot two rounds at 5,10,15,20 and 25 yards from the holster on the 3 x 5 rectangle over the heart. There is no time limit with deliberate accuracy being the emphasis. It is all about sights, trigger and grip. This drill takes 10 rounds. I then move over to my Orange Dot Drill.
At five yards, I draw and fire one round on the left orange dot. As I do this, I ask myself the following questions:
- Did my sight arrive on the dot or did I have to adjust? If it did not arrive where I wanted it, why didn’t it?
- Did my shot go into the dot? If not, why not?
- Did my gun return to the dot after recoil? If not, why not?
- Did I reset my trigger while recovering from recoil? Am I ready to shoot once I have returned to the dot?
As you can see, the amount of feedback I receive from just one round fired is immense! I shoot this drill three times with one round, three times with two rounds and three times with three rounds. I speed up as the drill proceeds. 18 rounds are fired and the skills practiced are obvious.
I follow this drill with what I call The Deliberation Drill. It is similar to the Vickers/Hackathorn drill “The Test” in that it requires ten rounds at ten yards. However, this drill is shot from the holster on the 3 x 5 rectangle. It emphasizes a deliberate draw to a specific point, a solid grip, minimal trigger manipulation and recoil control. In reality, if the gun doesn't return to the rectangle on its own, the shooter will run out of time. All hits must be in the rectangle or it is a failure. 10 rounds are expended. There are times when I shoot this drill multiple times if I feel it is needed.
Movement is something I have seen in every gunfight I have studied, including the famed Gunfight on Fremont Street, better known as the Gunfight at the O.K. Corral. That said, movement should not be random, it should be done with purpose and if the movement fails to offer a tactical advantage, the shooter should be prepared to move again. To emphasize this skill/tactic, I include either my 9 in 9 Drill or my 6 in 6 Drill. Both require rapid lateral movement followed by accurate shooting, the difference is primarily when the draw occurs.
The 9 in 9 has two firing points, fifteen feet apart and five yards back from the target. On command, the shooter draws and fires 3 rounds on the 3 x 5 rectangle. They then move laterally five yards to the next firing point, plant and shoot three more rounds. The shooter then rapidly returns to their original firing point and fires 3 more rounds at the 3 x 5 rectangle. All rounds must be in the rectangle to be deemed a success. The goal is all hits in around 9 seconds -- a tall order! In truth, if you can do this drill clean around 10 seconds you have done very, very well.
The 6 in 6 Drill is also shot five yards back from the target with two firing points 10 feet apart. On command, the shooter moves laterally, drawing on the move, to the first firing point and fires three rounds at the 3 x 5 rectangle. Once the third round is fired, the shooter moves back to their original firing point, as if the original movement gained them no advantage, and fires three more rounds. All rounds must be in the rectangle for the drill to be a success with 6 seconds being the par time. Either 6 or 9 rounds are fired depending on the drill used.
At this point, I have expended either 47 or 44 rounds. I finish the box of 50 performing Rich Nance’s Close Quarter Pistol drill of firing rounds at retention and backing away. If 50 rounds are all I have, my training session is over. If I have more, I will look at where I feel I am weak and work on those skills. What I like about this routine is I not only get feedback; I get a 50 round “workout” in combative pistolcraft skills. Don’t shoot any faster than you can hit. A “lucky run” isn’t educational, only deceiving. These drills should be learning points, not ego gratifiers.
More Practice
If I have additional ammo, I ALWAYS work on PLACING the gun on the target from the holster, ensuring the delivery is consistent and feels smooth…no bounce at the end. The felt aspects of shooting are grossly under-rated. Think of the draw stroke as an upside-down L with the gun coming up from the holster, turning, and going directly to the target. A good draw is one that arrives where you are looking...where you need it! I will use the orange dots on my target to enhance muzzle placement.
No, these drills do not account for everything that might happen in a gunfight, but understand there’s no way to prepare for that. History has shown that the person who prevails in armed conflict is the one who can keep his/her head and decide which of their practiced skills will solve the problem at hand. You must be aware, adapt and apply. The student that never practices is the one who will fail to decide. Stay safe out there!
— Dave Spaulding