
The Smith & Wesson “Triple Lock” pistols are considered by many to be the finest revolvers ever produced. They were manufactured from 1908 to 1915 in .44 Special, and were S&W’s newest “Hand Ejector” models, replacing top-break revolvers. The “Triple Lock” was replaced by S&W’s 2nd Model .44, which lacked the shroud underneath the barrel to protect the ejector rod, and didn’t have the third lock for the cylinder. Ever since then shooters and ‘smiths have been adding the missing lock. This can be a tedious, caution-filled modification or, you can get Power Custom’s “Crane Lock Ball Drilling Fixture” and add that third lock to your S&W wheel gun without anxiety.

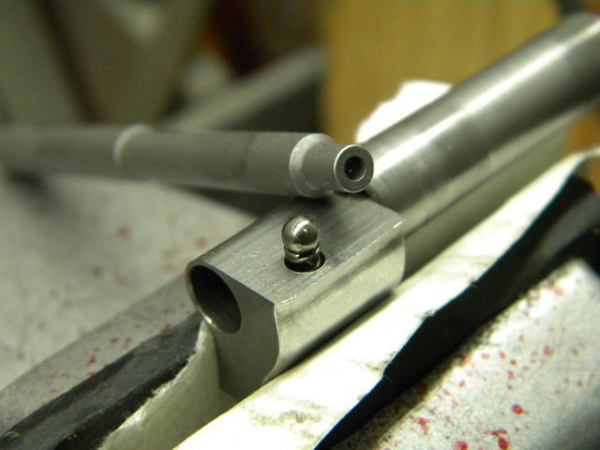
The crane slips into the PC jig, it goes into the vise and then you drill a hole .250” deep. It doesn’t get any easier than this.
|
The third lock was added to the hand ejector models because of pressures related to the new .44 Special cartridge. S&W took the .44 “Russian” cartridge and added .190“ to the case length and filled it with the new “smokeless” gunpowder. Then, the Special was extended another .125” to the length of the case to create the .44 Magnum.
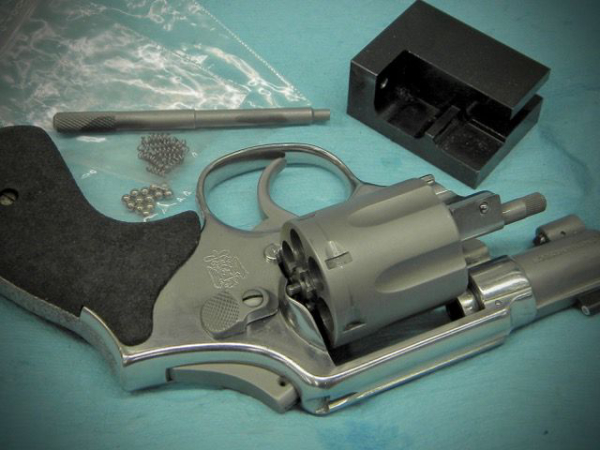
Adding the third lock to your current S&W revolver is an easy process – again using Power Custom’s kit. They supply a jig for drilling the required hole in the crane, the necessary drill bit, locking balls and detent springs plus a special punch for staking the ball and spring into the crane. With this kit, if you can run a drill press and rotary tool, you’re in business.
Start, as always, by checking to ensure your pistol is empty. Remove the cylinder and crane from the frame and slip the crane into the PC jig. This positions the crane perfectly for drilling, but you’ll still need to use a drill press or mill. Clamp the jig into your drill vise, and using a #30 bit drill a hole to a depth of .250”. The most difficult part of the process is done.
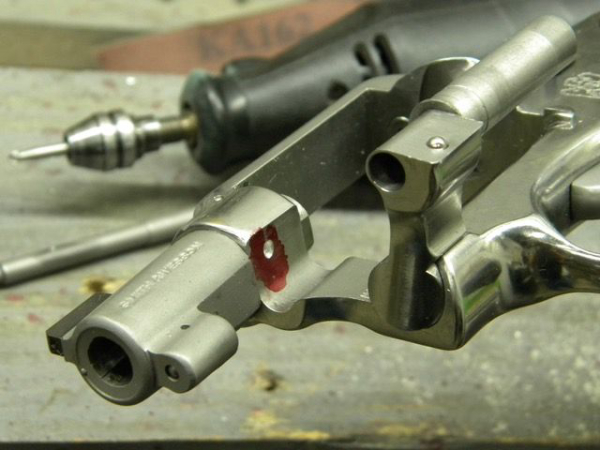
The ball detent and spring are installed in the crane using the supplied punch, which stakes the hole to retain the detent/spring. Apply a little marking fluid to the area of the frame where the ball indexes, install the crane and open and close it a few times. The detent ball leaves a mark, showing you where to use a 1/8” rotary bit to dimple the frame for the ball to lock into. (This video from Power Custom shows the exact steps involved for installation.)
I was very cautious with this process for my first revolver. Once I figured out exactly how/where to dimple the frame for the detent, the rest of them went easy and quickly. I did six cranes and frames in about ninety minutes.
Power Custom provides parts, supplies, tools and gunsmithing fixtures for a variety of different firearms. If you’re looking into performing some modifications, I suggest checking them out for what you need. Plus, you’ll likely discover something you didn’t know you needed; for me it was their fixture for truing the ejector rod for S&W revolvers. I don’t really know how I made it this long without it.
Tiger McKee is director of Shootrite Firearms Academy. He is the author of The Book of Two Guns, AR-15 Skills and Drills, has a regular column in American Handgunner and makes some cool knives and custom revolvers. Visit Shootrite’s Facebook page for other details.