
Part of learning how to defend yourself with a firearm is learning how to shoot it accurately. In the beginning you’re focusing on the fundamentals of marksmanship, or zeroing a weapon, so there’s nothing wrong with using “bulls eye” type targets. At some point you shift to defensive “accuracy,” which requires a different type target.
Flat two-dimensional targets are fine for target shooting. I use a lot of them for teaching, especially in the beginning. They have a human shape, and you can locate the various zones of the body – pelvis, chest and head. They aren’t that expensive, and are easy to store and transport. To help with defensive work I stencil the head with eyes, nose and mouth. Head shots are generally for special occasions – that’s all you can see to engage or you need the immediate incapacitation a proper headshot produces, most of the time. Normally you get one opportunity for this shot; regardless of why you’re making a head shot it has to be “accurate.” In this case we’re talking surgical accuracy. From a frontal view of the head the hit needs to be placed in the ocular cavity, right between the eyes and nose. Adding a little more anatomy to the target provides a more realistic expectation of where the shot should place.
I’m also a fan of negative targets. Take a cardboard target and cut out the appropriate size hole in the proper location. Your goal is to place all the hits through the hole; no hits on the cardboard. “But,” they say, “I can’t see my hits.” This is as it should be. You won’t see them in real life either. The threat is moving as you fire, and remember they have clothes covering the body. (Covering your targets with old t-shirts is a great way to add realism, and hide the hits.). Negative targets get you out of the habit of looking for the hits, which wastes time. The threat will let you know when you’ve hit them often and well enough.
It’s interesting that most people shoot more accurately and efficiently with negative targets. When you give them a small point of aim, like a four-inch diamond, they try too hard, and will scatter the shots all about. With a negative target I normally see their group size decline, significantly. It’s sort of ironic – to shoot accurately you can’t be thinking about hitting the target.
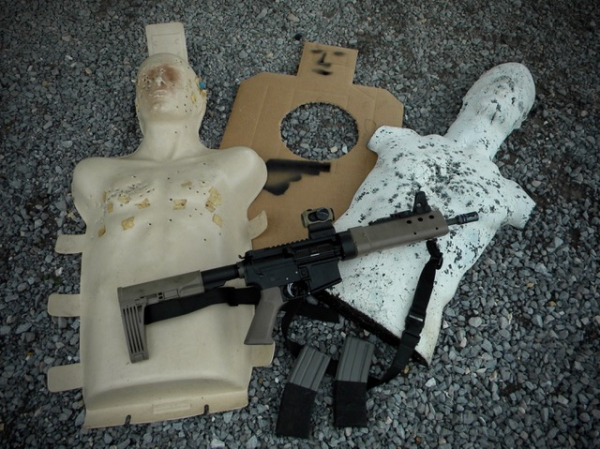
The ultimate targets for defensive training/practice are 3-D, human shaped. It will be rare for the threat(s) to be there squared up in position right in front of you. Angular views are much more common. 3-D targets add realism – closer to the actual shape of a person. Placing a cardboard target behind the 3-D shape allow you engage different parts of the body from various angles, then check the cardboard to see if the shots are going “center mass.” 3-D targets come in a variety of types, such as hard-shell plastic and the ones made from dense rubber – all are well worth the cost.
The goal of defensive shooting is to be as accurate as required in the shortest time necessary. It’s all about regulating your speed. For example with chest shots you’re looking for a six-inch group. Firing from three yards should be much quicker than your speed from twenty yards. The group size should remain the same; the pace will vary, especially when engaging different parts of the body. Defensive training and practice should be with targets that are appropriate for this application. Plus, working with different targets adds a little variety, which is always fun and challenging.
Tiger McKee is director of Shootrite Firearms Academy, which is celebrating its twenty-fifth anniversary. He is the author of The Book of Two Guns, AR-15 Skills and Drills, has a regular column in American Handgunner and makes some cool knives and custom revolvers. Visit Shootrite’s Facebook page for other details.